How to Manage Contact Groups
Overview
This article guides you on how to Add, Edit or Delete a contact group.
Adding a Contact Group
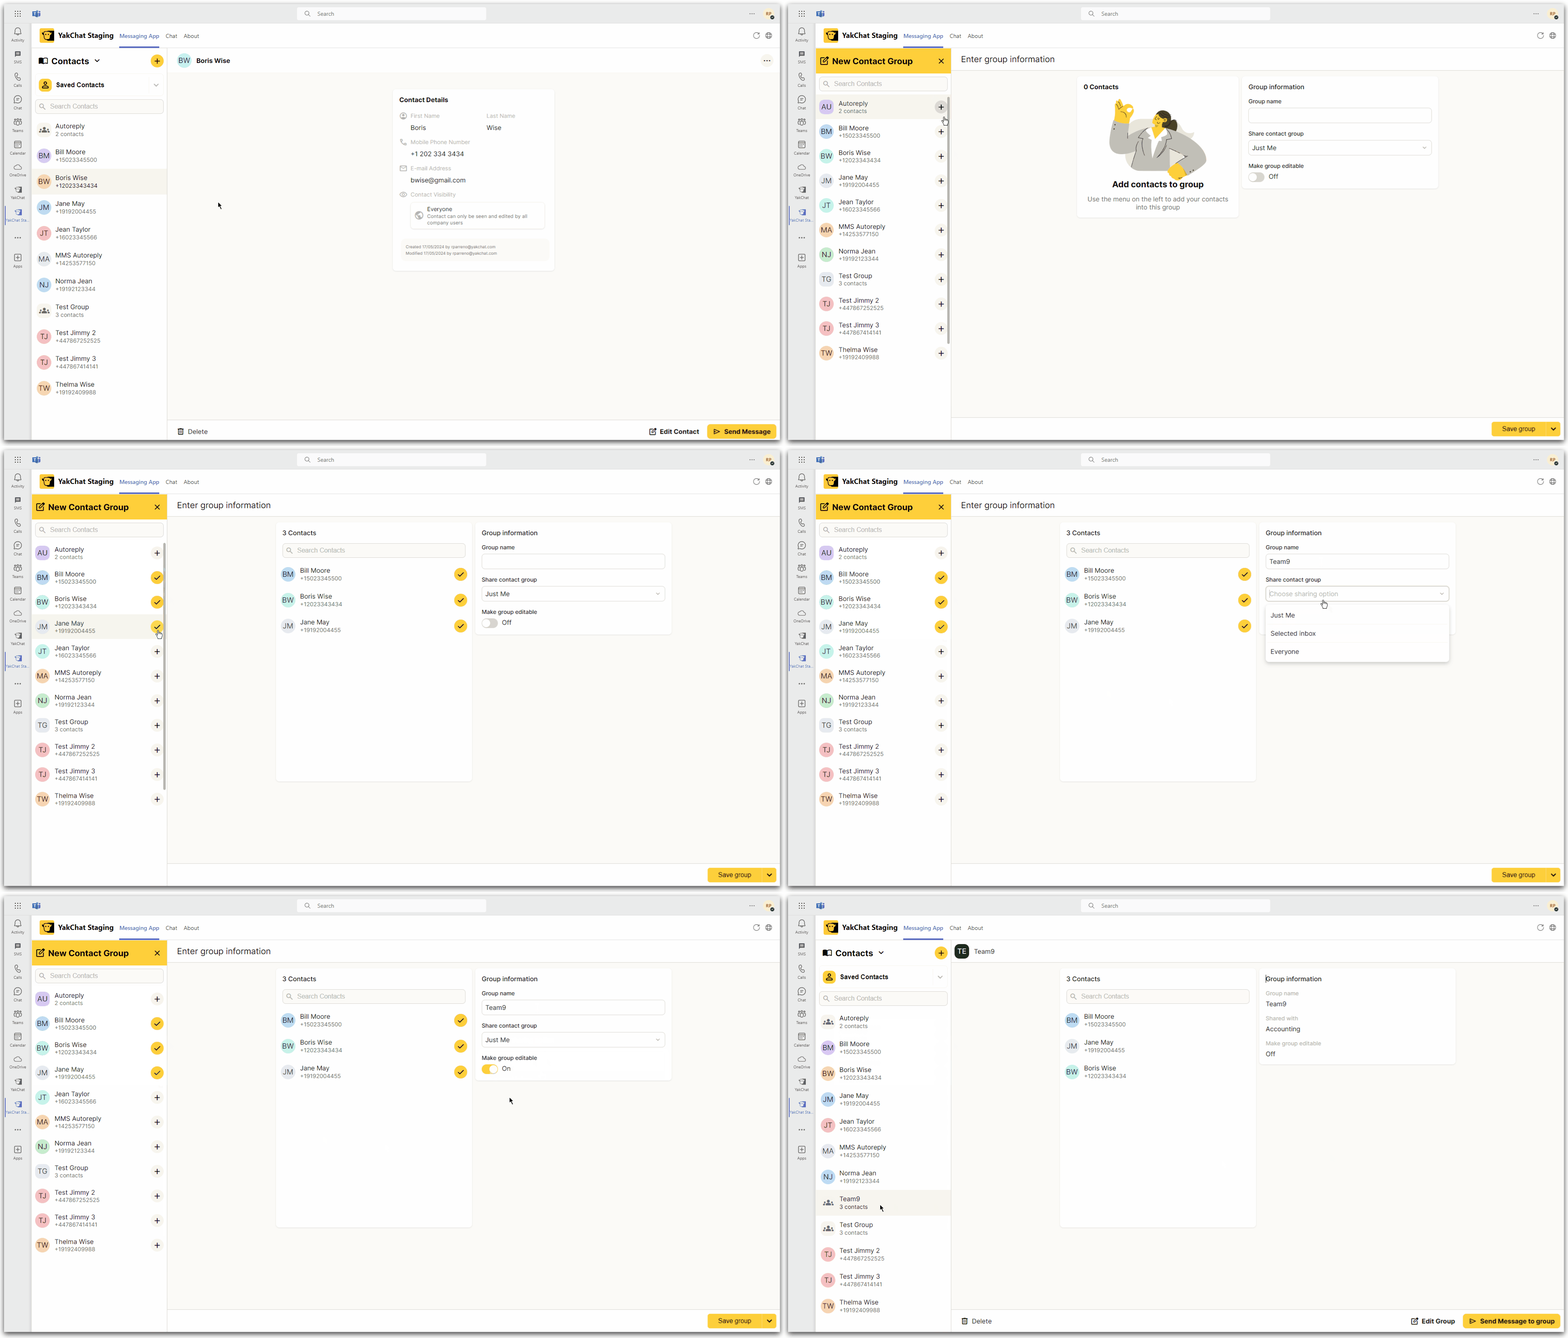
In the Contacts tab, select the + button and click New Contact Group.

The group editor will be displayed in the primary panel which will allow you to enter the following group information:
1. Group Name
- Enter the name for group base on your liking and needs but the group name should be more than 2 characters length.
2. Share contact group
- This section allows you to choose your sharing options which are Just Me, Selected Inbox or Everyone.
Note: All contacts that is added to the group should have the same sharing permission
3. Make group editable toggle
- You can turn on or off the editing capabilities for the group
To add users to the group, search for a contact and select the + button next to the contacts name.
Once you have completed the form and added the contact to the group, click Save group button. Your contact group will be displayed in your contact list.
Editing contact groups
To edit a contact group you will need to select the contact menu and then select the contact group that you want to edit. Click on the Edit Group button at the bottom of the page to enable edit mode.

Note: You may only edit a contact group if you have created the group, own the group or you have been given permission to edit that group by the creator or administrator. For more information about this see the contact sharing section by clicking here.
Once changes is made, press Save.
Deleting contact groups
To delete a contact group, first you need to select the contact group you want to delete. Click the Delete button at the bottom of the page.
A pop-up will show to confirm that you wish to delete this contact group by clicking Yes, Delete button.