How to Connect YakChat to Your Bandwidth Telephony Service
Overview
YakChat can connect to your Bandwidth telephony service in 5 easy steps:
- Enable SMS on your Bandwidth service
- Create a user profile to access the API
- Add SMS to a Bandwidth Application
- Add SMS and YakChat callback URL to your number(s)
- Send API information to YakChat at info@yakchat.com
We’ll then test the connection for you and confirm when everything is set up.
Step 1: Enable SMS on Bandwidth
To connect YakChat to your Bandwidth telephony, first contact Bandwidth to enable the SMS service with https API (v2).
Go to your Bandwidth Account page and make a note of your Account number (not the Global Account Number prefixed with ‘BW’.
Include the Account number with the information you send to us (described in Step 5).
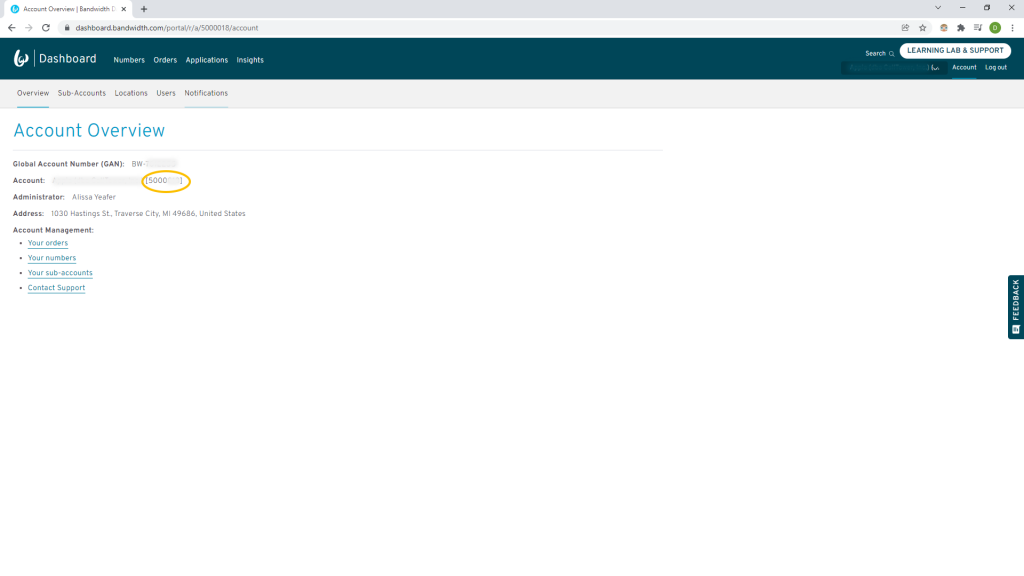 Screenshot of Bandwidth Portal
Step 2: Create an API User
Once the SMS service with https API (v2) has been enabled, create a new User with permission to only access the API, using the Bandwidth Portal in the usual way.
Step 3: Add SMS to a Bandwidth Application
To enable the SMS settings to be added, an Application must be created in the Bandwidth portal.
Do this by selecting Applications in the top menu bar.
Then click Create New and complete the following information:
- Add the name of your Application in the Application name field
- Ensure your Application type is Messaging
- Click the checkbox Use multiple callback URLs
- Enter https://sp.yakchat.com/bandwidth/message in the Inbound Callback URL field
- Enter https://sp.yakchat.com/bandwidth/statuscallback in the Status Callback URL field
After entering the above information, click the Create Application button to save the application.
Select the Application and make a note of the Application ID which will be needed in Step 5.
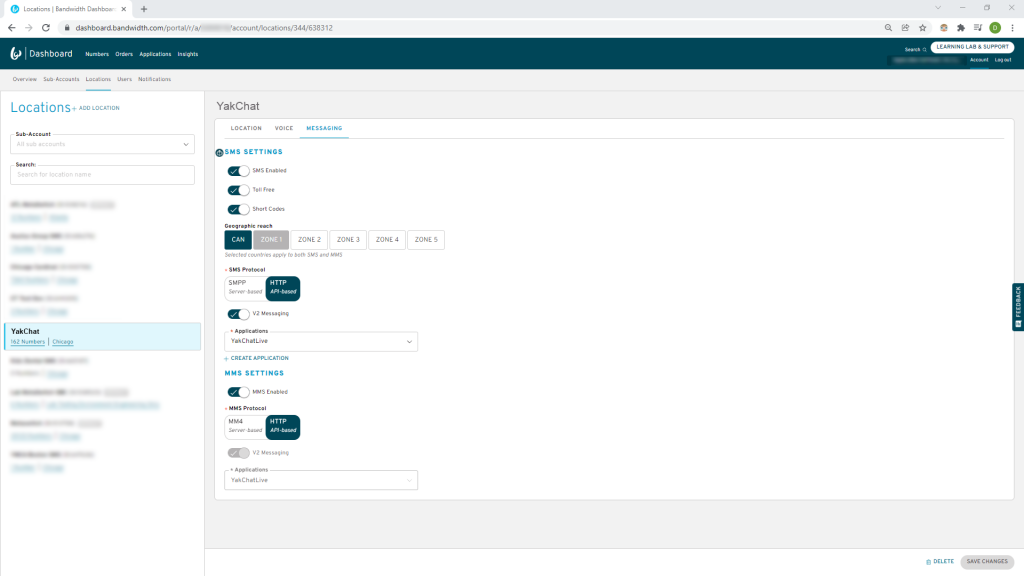 Connect YakChat to BandwidthNow select an existing Location or create a new Location and select the Messaging tab.
Then add the following configuration:
- SMS Enabled – On
- Toll Free – On (optional)
- Short Codes – On (optional)
- The correct Geographic reach is selected
- Select HTTP in the SMS Protocol
- V2 Messaging – On
- Select your Application from the Applications drop-down menu
- MMS Enabled – On
Step 4: Add SMS to your Numbers
Assign the numbers that you want to use for SMS in the Location you created in Step 3.
Step 5: Submit your connection details
Enter the following Bandwidth connection details in the form below:
- Select "Bandwidth" as the SMS service provider
- Enter your Account number (not the Global Account Number prefixed with “BW”) (Step 1)
- Enter your Application ID (Step 3)
- Enter your API user name into Integration Data 1 (Step 2)
- Enter your API user password into Integration Data 2 (Step 2)
- The phone number we can use to test the service is working correctly (Step 4)